
Hello and welcome to this tutorial article.
I will be showing you how to access your project settings.
In MarketingBlocks, a project setting functions like a dedicated folder within your account. It allows you to efficiently organize your work and the generated assets related to a specific project. This helps streamline management and access to various marketing materials.
Let's dive right in!
Step 1: From your dashboard, choose your preferred project.
- Then click "Project Setting" at the right-hand-side of your dashboard.


Step 2: A page will open. Under the "General" complete the following details as shown in the screenshot below.


Step 3: Next, is the Brand Toolkit.
The Brand Strategy Toolkit in MarketingBlocks AI is a comprehensive set of tools designed to help users develop and refine their brand identity. It provides templates and resources for discovering key elements of a brand, including its heart, voice, and visual identity. This toolkit simplifies the process of creating a consistent and effective brand strategy using AI-powered assistance.
- You can rewrite the "Brand Strategy Toolkit" provided for you.
- You can also "Edit"


Step 4: Next, is the "Info Tags"
InfoTags is a helpful tool for managing your brand's information across MarketingBlocks.
This handy feature allows you to store essential details about your company, such as brand description, guidelines, voice, value propositions, and positioning documents.
Imagine you engage Ethan to create a logo for your business, and it asks you to input your business description. You go ahead to type in the long description, blah blah blah. And then again, you want to create some banners, and Ethan once again asks you to input your business description…
So, instead of having to type in this frequently used information every single time you need them, why not save them as InfoTags, and have them handy?
It saves time and enhances content quality by easily referencing and using these InfoTags anywhere and anytime within the MarketingBlocks Suite.
- Click "Create Tags" A pop-up will appear.
- Enter the needed details and click "Save"
- You can choose to upload a file and also use a URL to get content.


Step 5: Next, is the "Custom Domain"
- Click "Add Custom Domain"
- Copy the generated URL


Step 6: Log in to cPanel.
At this point, you need to create a subdomain in your web hosting Cpanel account. NameCheap will be used in this article, but note that this process is the same for any hosting site you use.
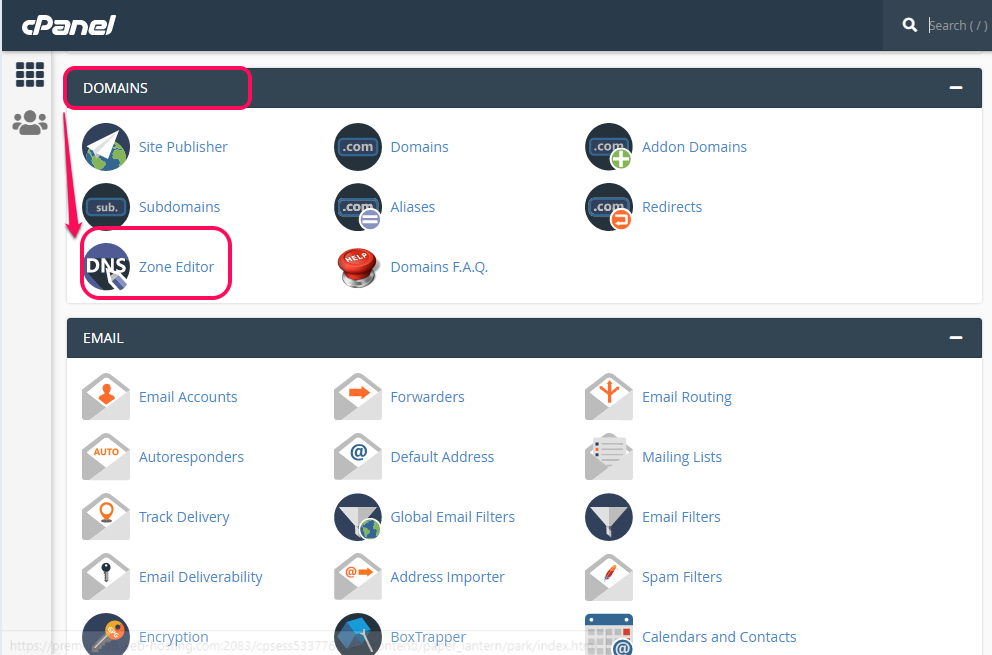
First, log into the Cpanel and scroll down to find “Zone Editor”.
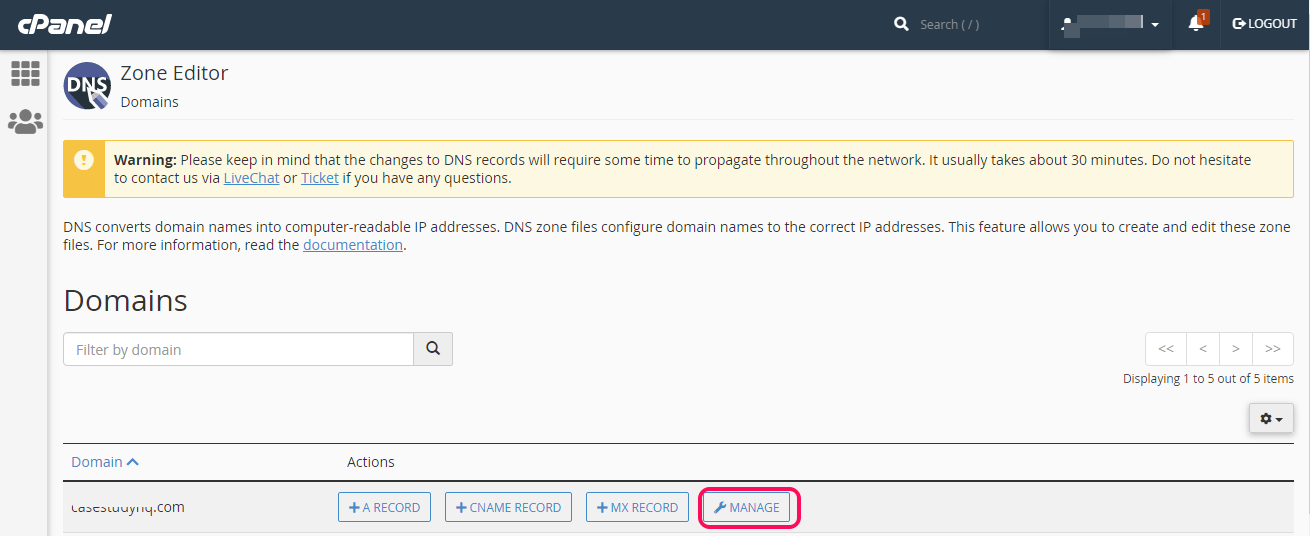
Step 7: If you have more than one domain, just click on “MANAGE” in front of that particular domain you want to point to your MarketingBlocks generated domain.
Step 8: Click on Cname and then Add Record
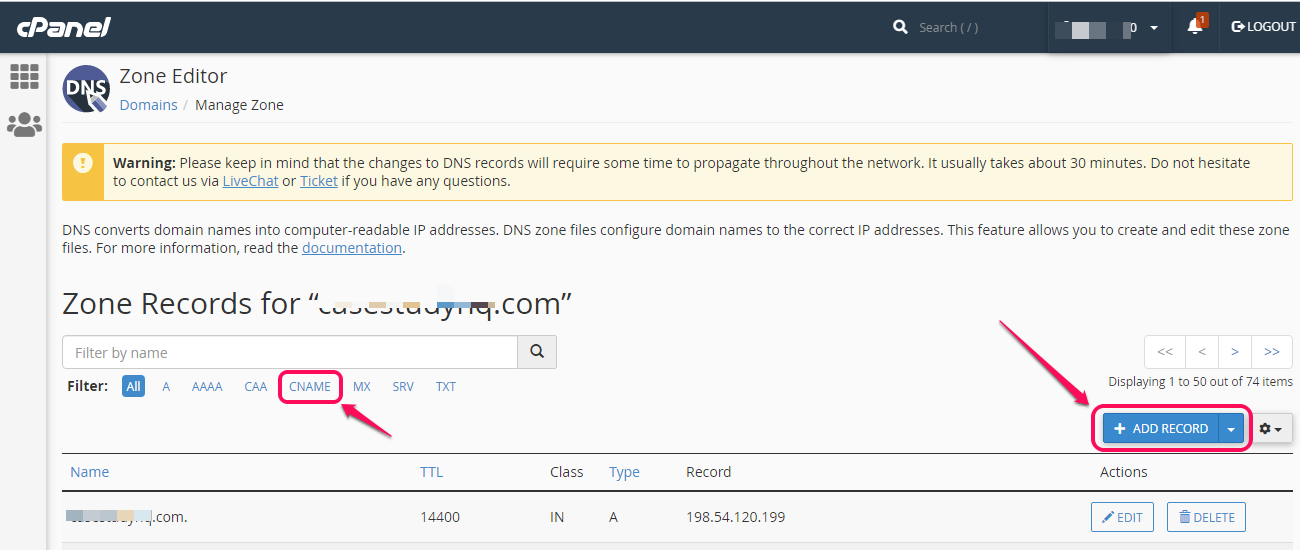
Step 9: Enter the copied domain from your MarketingBlocks domain and add it as your Cname record then your custom domain example.customdomain.com as the name record.
Add the Subdomain to the MarketingBlocks Page Builder
Enter the subdomain you have created in your Cpanel, as shown in the screenshot below, and click Add Domain.
It takes 24-48 hours for the SSL to propagate. You will need to be patient.

If you need further assistance, kindly use the chat widget at the bottom-right corner of this page or email our support desk(support@marketingblocks.ai) for prompt assistance.