

This article walks you through the steps to connect your X account
Below are the steps:
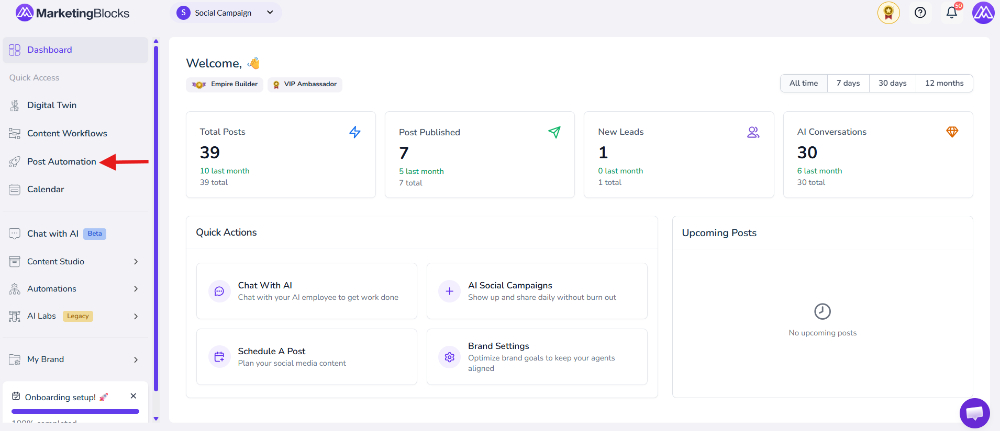
Step 1: From your dashboard, click on Post Automation.
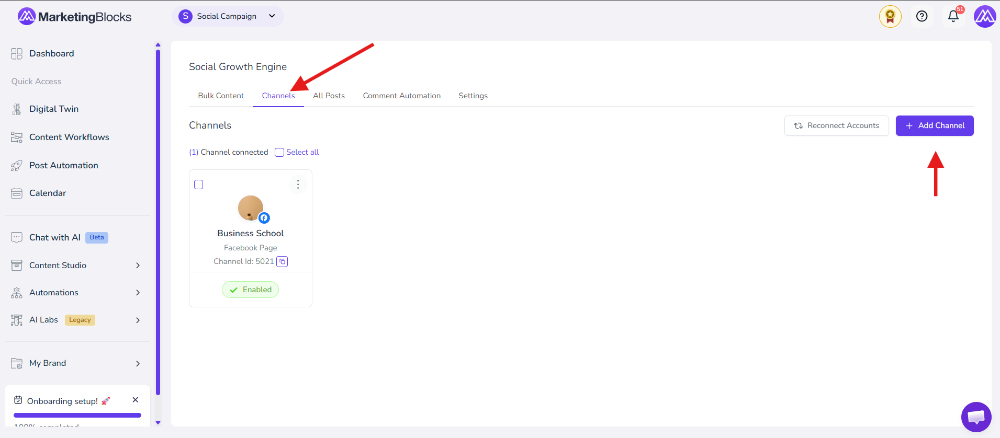
Step 2: When it opens, click on Channels and add a channel
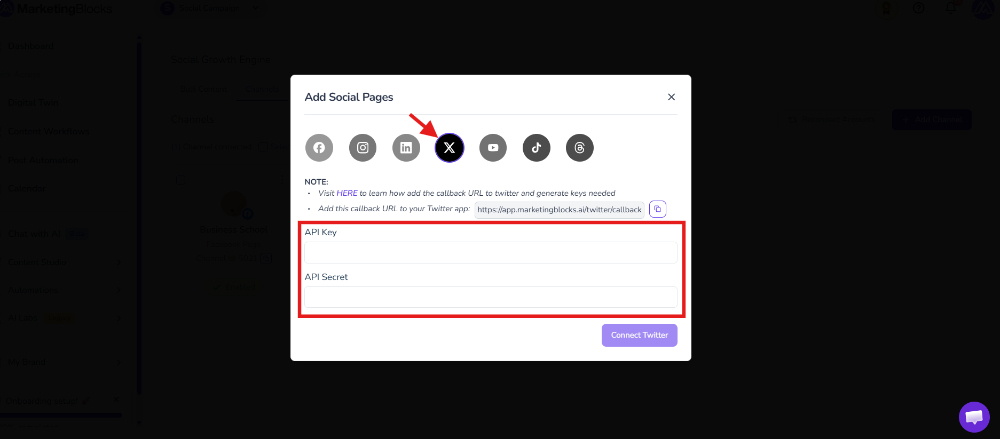
Step 3: Notice a pop-up to add a Social Page; select the fourth option, the X Icon. You will be required to get these keys.
NOTE: You must ensure that you're logged in with the same device or browser to your X account to get the following details
- API key
- API Secret
- Copy the Callback URL, you will need it in the settings inside the Console.x.com
To access this, you will need to go to https://console.x.com and make sure you're signed into your X account
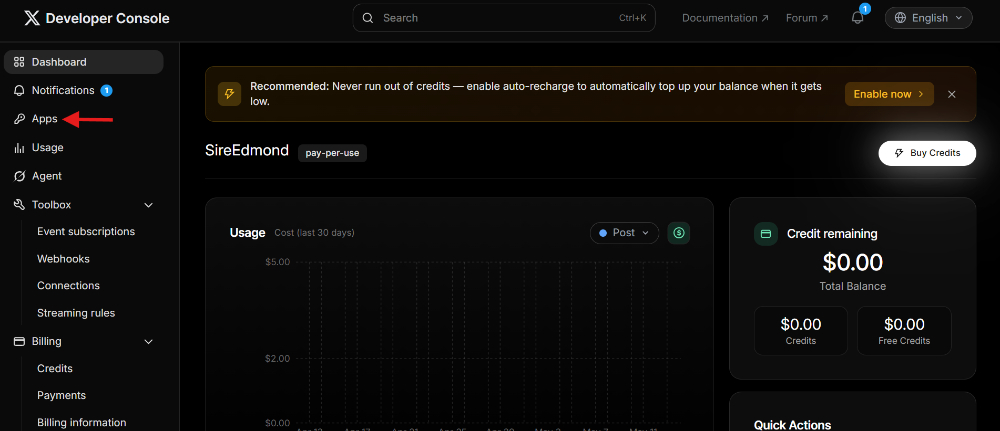
Step 4: Once you're in the Developer Console (https://console.x.com/), click on Apps
Step 5: When it opens, switch it from Free to Pay Per Use because Free is deprecated.
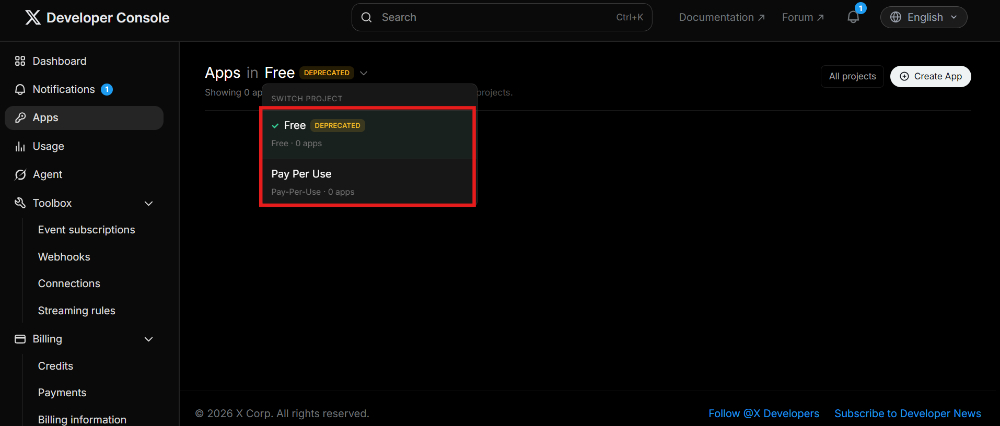
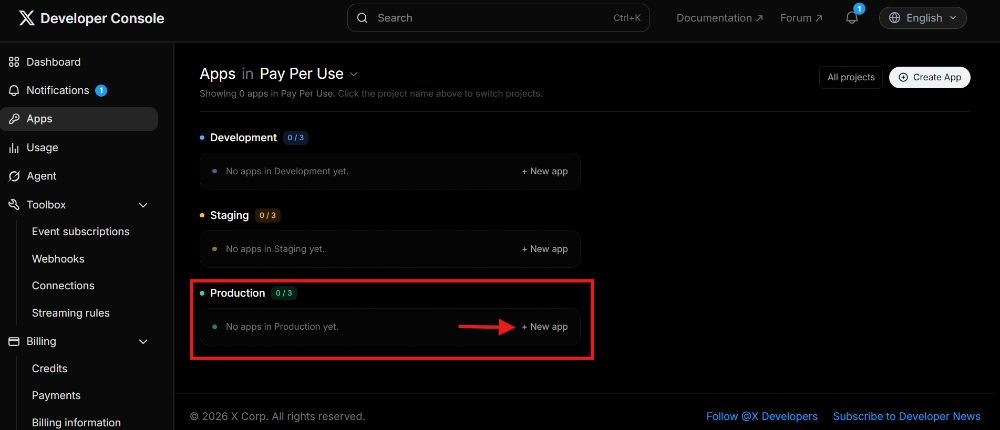
Step 6: Once you switch to Pay Per use, Please Note: When connecting your application for live/public use, you should always create and use the app under the Production section.
This is because the Production environment is designed for real-world usage, live integrations, stable connections, and public-facing deployments. It ensures your application runs using the correct live configuration and avoids limitations that may exist in Development or Staging environments. So you proceed by clicking on +New App
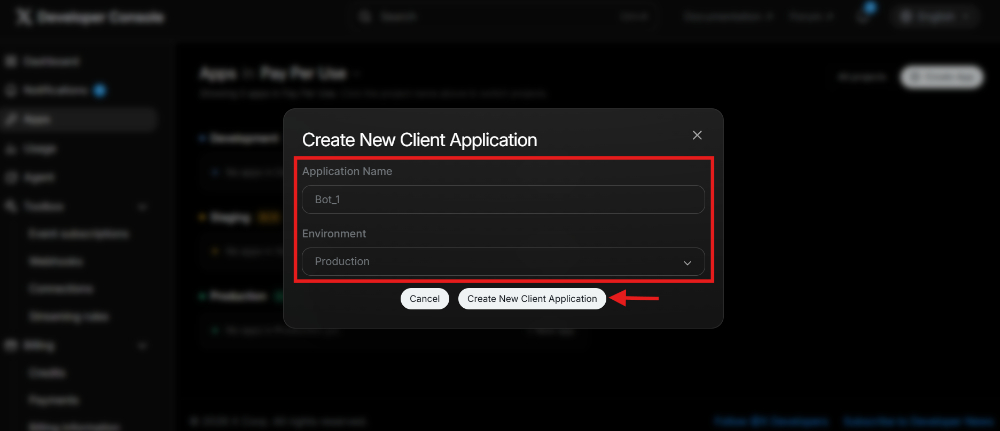
Step 7: You will need to add the application name and select the environment. Once done, click on Create New Client Application.
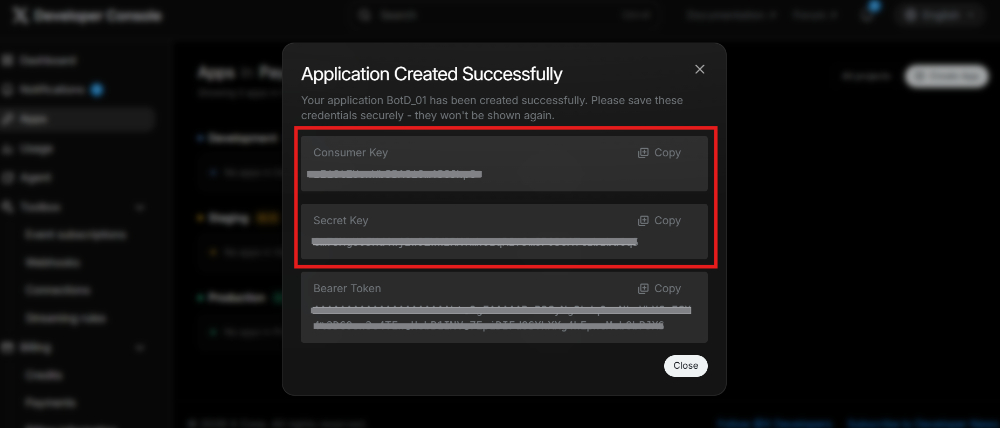
Step 8: When done, copy the Keys Generated and save them. This is what you will input to your Marketingblocks Account: Ref to Step 3
Pro Tips: Under Step 3, Note "C", you will need to do the following
- Paste the Callback URL ( inside the settings of the New Client Application created
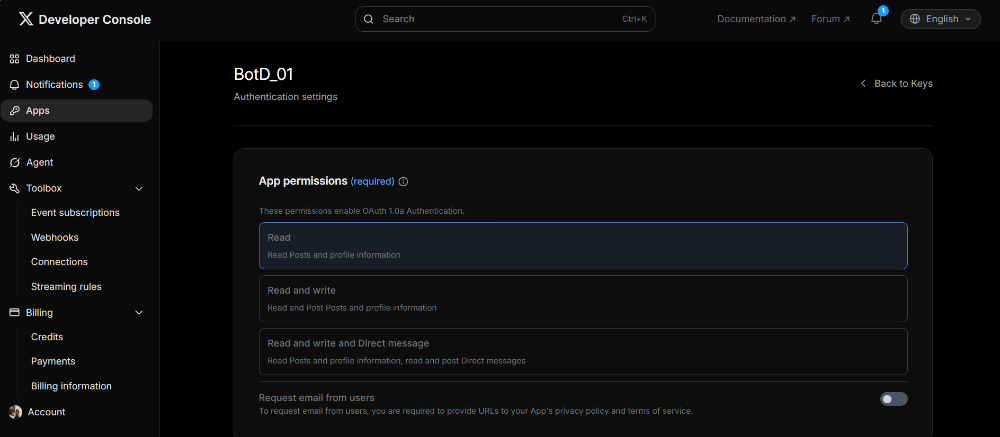
- Make sure it is in Read and Write, and Direct Message inside the same settings
- Toggle on Request Email from Users
- Web app, Automated App, or Bot
- Website URL (required): https://marketingblocks.ai/
- Organization name (optional): MarketingBlocks
- Organization URL (optional): https://hey.marketingblocks.ai/
- Terms of service (required): https://marketingblocks.ai/terms/
- Privacy policy (required): https://marketingblocks.ai/privacy-policy/
To do the above, continue with the following steps
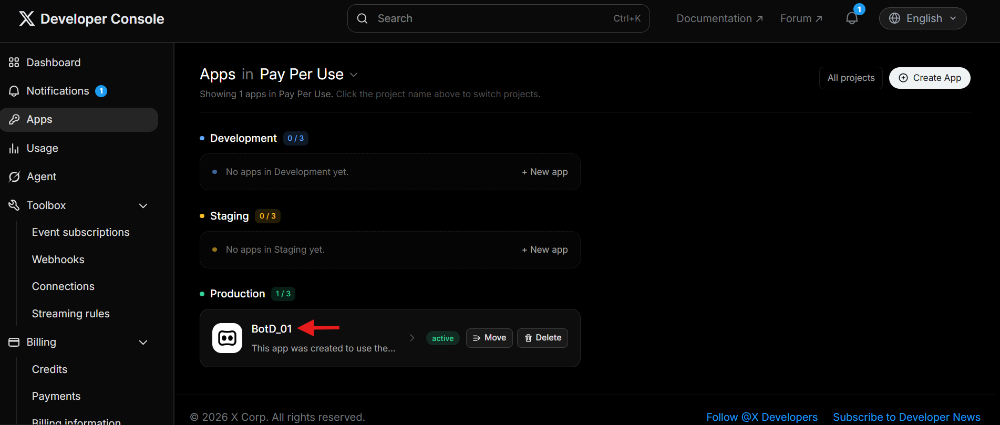
Step 9: Click your Client Application name inside the Production
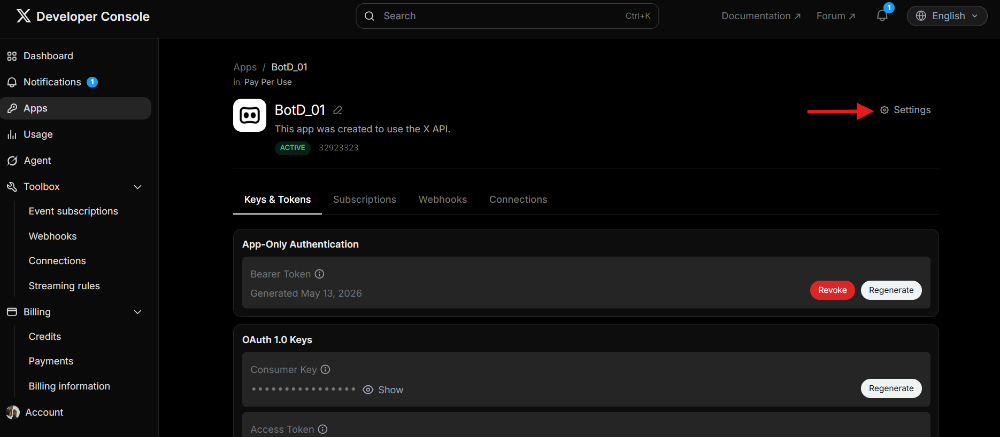
Step 10: Once opened, click on Settings in the top right corner
Step 11: Then follow the Pro Tip Above to fill in the Settings. Once done, save the settings. and go back to Key.
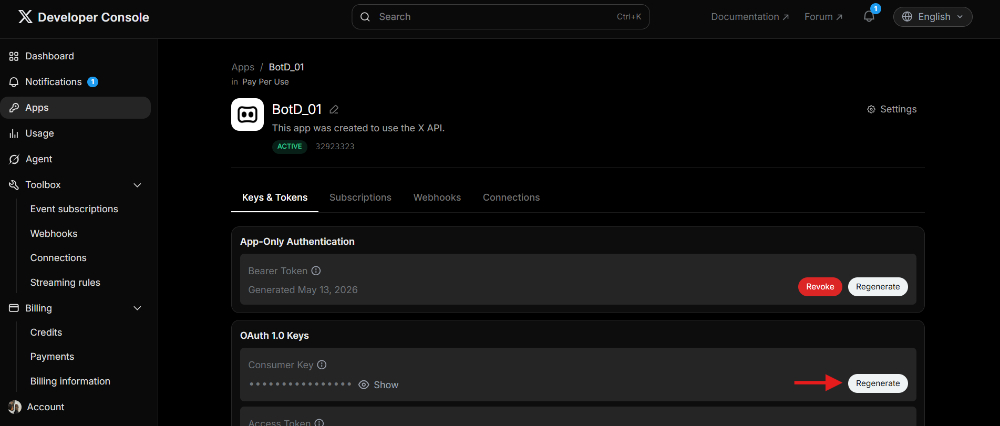
Note that since you have edited the settings and saved them. you will need to revoke or regenerate your Token Keys. Simply click on Back to keys. Once done, from below
Step 12: Click on Regenerate once it generates. Copy both Keys and paste them in Step 3 ( inside Marketingblocks X channel Keys)
Step 13: You will need to authorize the app to access your account. Simply click on it
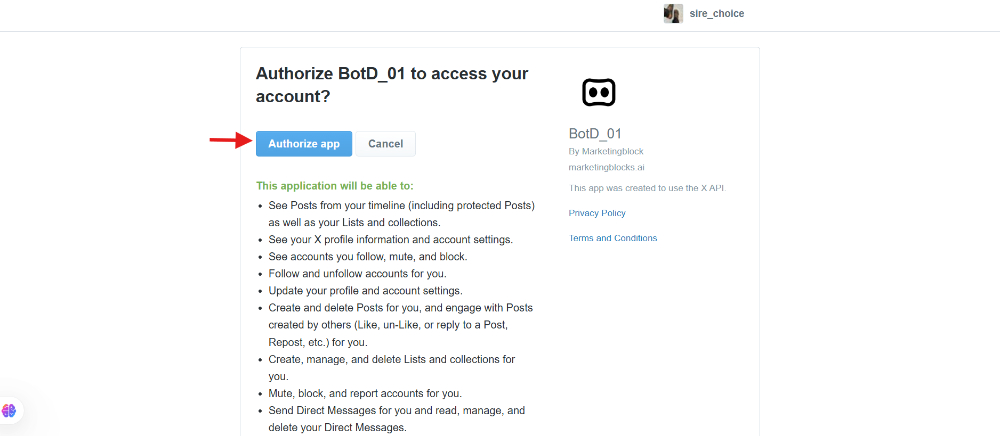
That's it, you will notice a successful connection.
If you need further assistance, kindly use the chat widget at the bottom-right corner of this page or email our support desk (support@marketingblocks.ai) for prompt assistance.
Thank you!