
In this tutorial, I will walk you through the simple steps to set up a custom domain inside your Page Builder 3.0.
Follow the steps below to access the custom domain:
Step 1: Log in to MarketingBlocks, then create a new project or select an existing project. For this training, I would be using the Default project.

Step 2: Click on the AI Page Builder tool as demonstrated in the screenshot.

Step 3: Click on Custom Domain.

Step 4: Click on Custom Domain Management

Step 5: Copy the generated URL.

Step 6: Log in to cPanel.
At this point, you need to create a subdomain in your web hosting Cpanel account. NameCheap will be used in this article, but note that this process is the same for any hosting site you use.
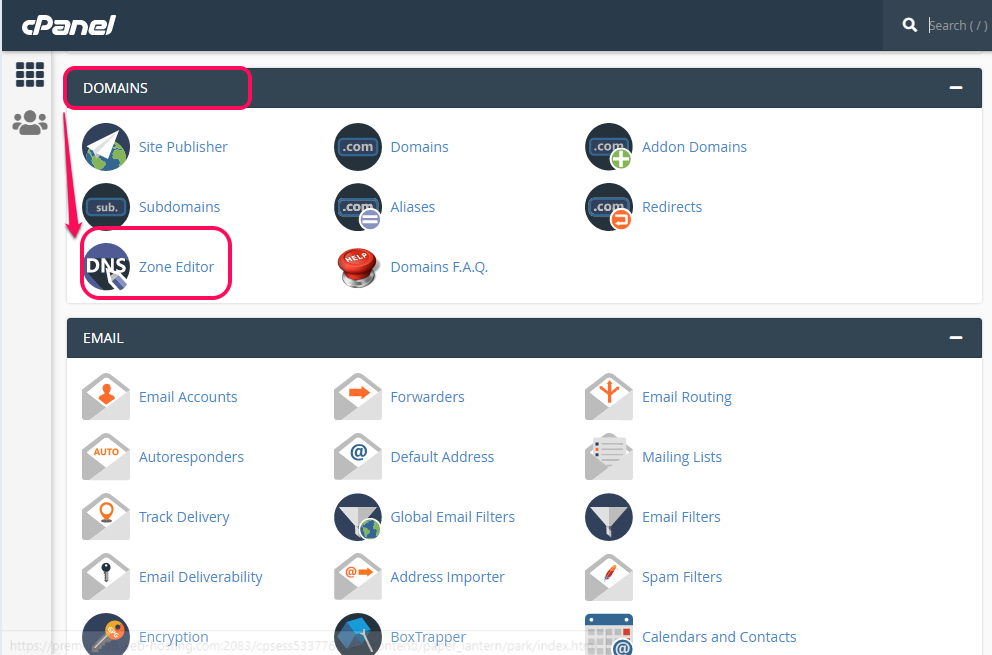
First, log into the Cpanel and scroll down to find “Zone Editor”.
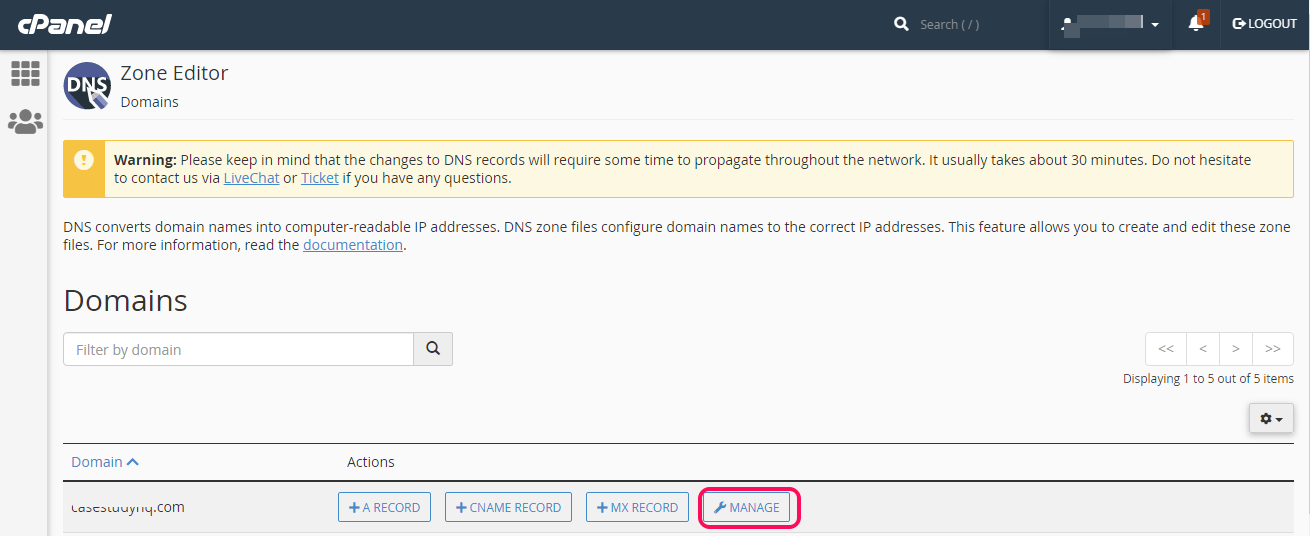
If you have more than one domain, just click on “MANAGE” in front of that particular domain you want to point to your MarketingBlocks generated domain.
Click on Cname and then Add Record
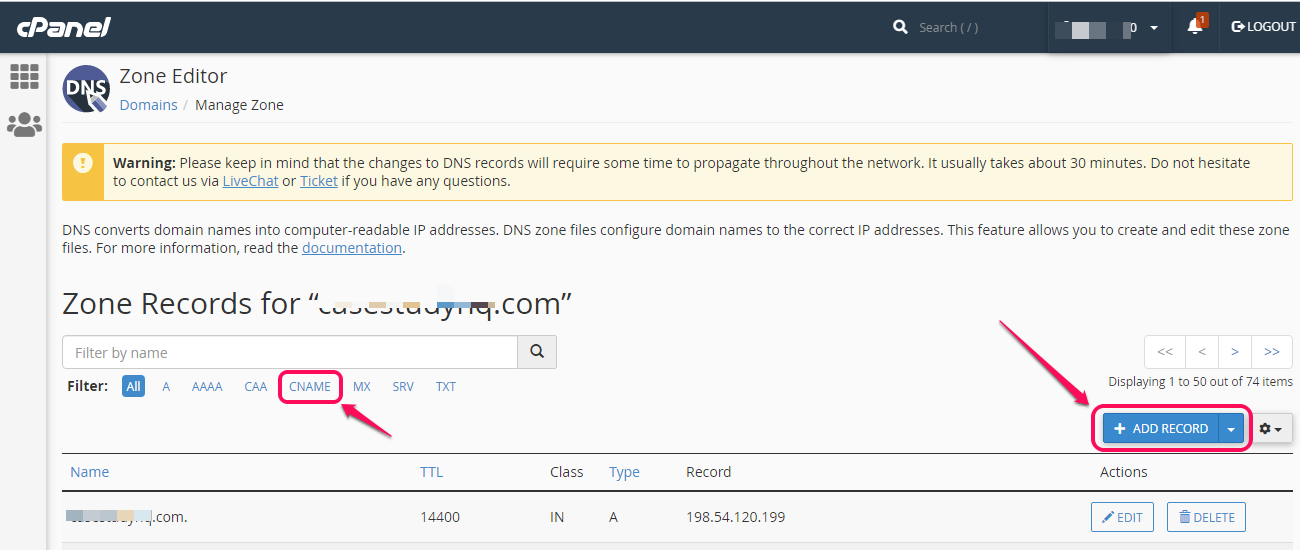
Enter the copied domain from your MarketingBlocks domain and add it as your Cname record then your custom domain example.customdomain.com as the name record.
Add the Subdomain to the MarketingBlocks Page Builder
Enter the subdomain you have created in your Cpanel, as shown in the screenshot below, and click Add Domain.
It takes 24-48 hours for the SSL to propagate. You will need to be patient.

And that’s it!
If you need further assistance, kindly use the chat widget at the bottom-right corner of this page or email our support desk (support@marketingblocks.ai) for prompt assistance.
Thank you!